
On this page, it is shown how YouTubers can verify ownership of their channels and how they can then use the Map Manager to add/remove videos to and from the map as well as place their videos to different locations. A video showing how the process is done is also available right next to this text.
Step 1 – Register to the Website
First, you need to register to the website. You can do so by clicking on the “The Login” button on the top-right corner of the website. From there on out, you just need to follow the typical login process, which you are likely to be familiar with from other sites.


Step 2 – Verify Your Channel
Following the website registration, you will then need to verify ownership of the channels for which you want to edit the map data of. For this, you need to open the “Verify Channel” page. Then do the following steps:
- Click on the Verify my Channel button.
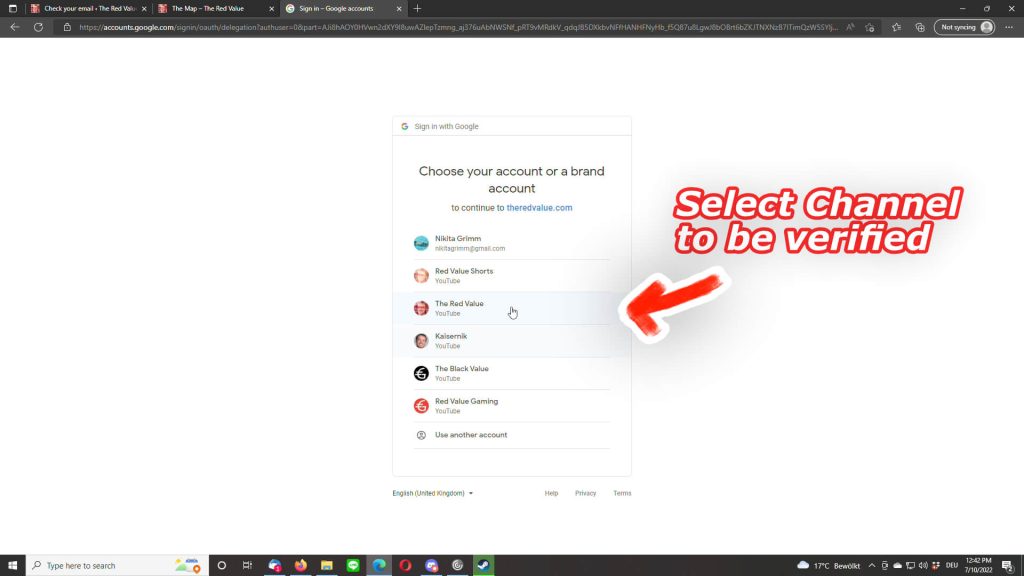
-> A Google Authentication screen should now open up. - Select your Google Account and then YouTube channel which you wish to verify on this site.
-> The channel should now be verified. - (Optional) If you wish to verify another channel, click on the Verify Another Channel button and go back and restart this verification process anew. Do this until you have verified all channels that you wish to edit data for.
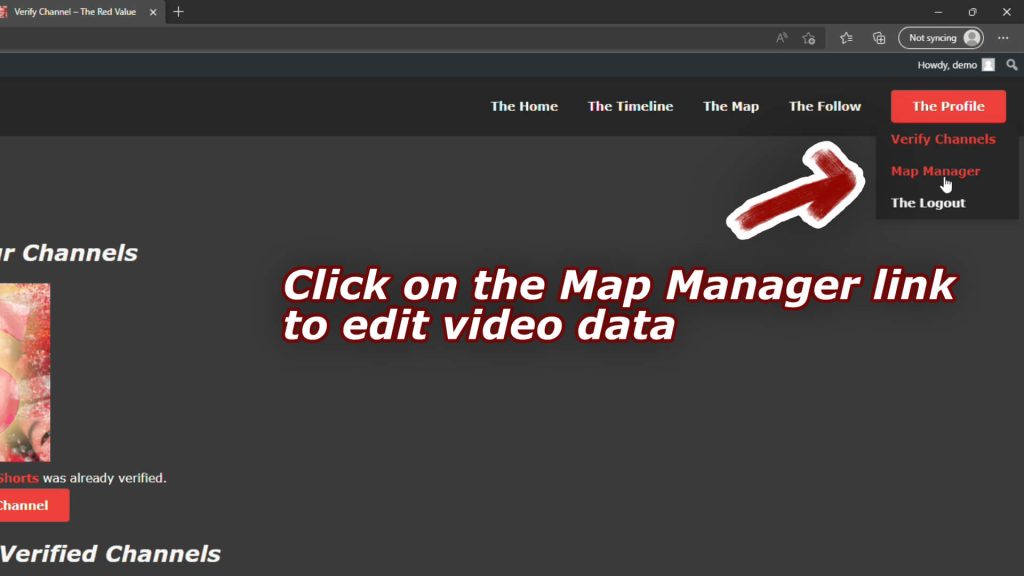
- (On Condition) In case your channel is not processed by the Japan Map yet, you may request it being added to the map. After verification, open the “Map Manager” page.
- (On Condition) In the list of channels, press on the “Request Activation” button. An admin will then be prompted to approve your channel shortly. Once approved, the AI will start processing your videos, which will then be gradually appearing on the map.
Step 3 – Open the Map Manager
Once your channel is approved, the Map Manager will function as the tool giving you the ability to edit the data of your videos. Open it and select a channel to get started.
First, you need to open the “Map Manager” page. Then, you can do one of the following things to add or remove a video from the map.
- From the list of verified channels, click on the one that you want to edit video data for
-> A list of videos of that channel should then appear in the table below. - (Optional) Find the video quickly by either entering its title or video id as a filter in their respective table columns. The video id is part of the URL of the video. E.g. if the video URL is https://www.youtube.com/watch?v=JjM8a-KlQJs, then the video id is JjM8a-KlQJs.
-> Only videos following the filter will now show in the table. - Select the video you want to add/remove to/from the map and click on the Edit Video Data button.
-> A popup now appears. - You can now edit the Is Location Based setting of the video. Select one of the following:
- Not Location Based – The video will not show up on the map.
- Locations Mentioned – The video will not show up on the map when searching for videos near a location. It will show up on the channel map only however. In the future, Creators will be able to decide if they want the videos shown on their personal maps or not.
- Is Location Based – The video will show on the map.
- (Optional) Set whether or not the video is based on Japan or Japanese Culture. Currently not used, but will be used in the future once enough data is available.
- Press on the “Set Video Properties” button to save your entry.
It is possible to change the location the video appears at. One can do so as follows:
- Make sure a video is selected in the video table.
-> A list of locations, detected by the AI, should then be shown in the location table. Note: It is possible that the list is empty if the AI didn’t analyze the video previously or didn’t detect any locations - (Conditional) If the location you wish to set as the video’s location is not available in the table, you may add it manually by clicking on the “Add Location” button below the table. If the location is available, skip ahead to bullet point 4.
-> A popup should now open. - Add the name of the desired location and optionally a Wikipedia Link. Then press on the “Add Location” button in the popup.
-> The entered location should now appear in the location table after a few moments. - To confirm the desired location the video, press on the respective “Set” button in the “Main Location” column.
-> The video should now appear on the new location on the map.

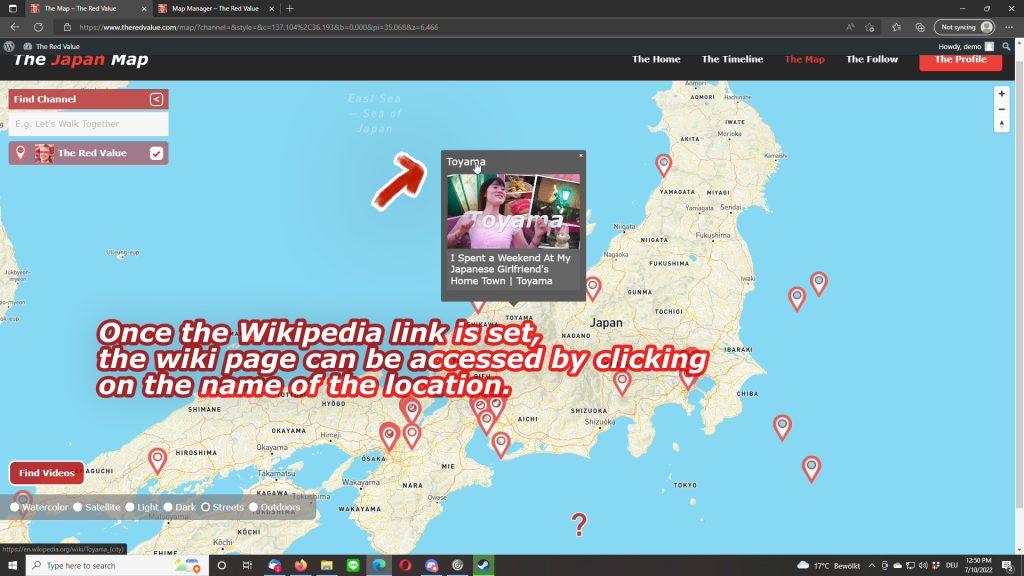
The AI is capable of generating appropriate Wikipedia links for most of the locations extracted from the video data. In the cases where this isn’t done, it is possible to add those Wikipedia links manually.
- As long as a video is selected, click on the “Add Location” button again.
-> The prompt to add a location should also open up again. - Enter the name of the location with the missing wiki link.
- Copy and paste the appropriate wiki link into the Wikipedia Link field.
- Press on the “Add Location” button to add the wiki link to the video.
Info: A Wikipedia link may only be entered if there was previously no link set for the location. An error will also be shown if the Wikipedia link doesn’t pass the verification. The currently allowed format is specified in the regex shown here: regexr.com/6rar8

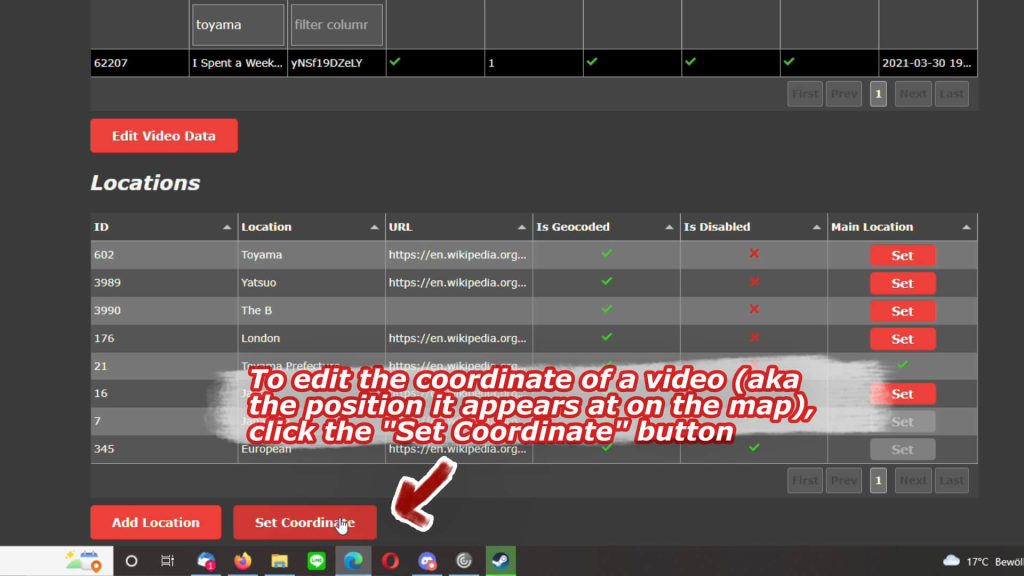
You may have now set the location of the video to something that fits it (E.g. Osaka for a video in or around Osaka). However, perhaps the direct position, aka coordinate, on the map isn’t to your liking yet (e.g. you want the marker to be further to the east). In case this happens, you are able to customize the coordinate of the video.
- Click on the “Set Coordinate” button as long as a video is selected.
-> A popup giving you a list of coordinates and a map should pop up. - Select one of the coordinates from the list on the left or click on them directly on the map to select a coordinate fitting the video.
- If none of the coordinates are to your liking, you can instead set a custom coordinate. To do so, check the Custom Coordinate checkbox.
-> A new drag-able marker should now appear on the popup map. - Drag the marker to the desired position and then click on the “Set Main Coordinate” button to confirm the coordinate
-> The video should now appear on the custom location on The Japan Map. - Info: If you change the main location after you set a custom coordinate, you will need to set the custom coordinate again. The previously entered custom coordinate will however be stored for quick re-enabling.